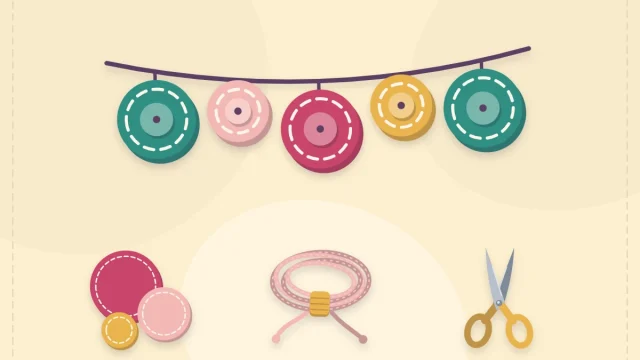
Felt Wall Decor: A Layered Banner on a Dowel and a Hoop Variation
Make layered felt wall decor from one sheet of felt and a few cut shapes: a pennant banner on a dowel with a sun, cloud and raindrops, plus an embroidery-hoop version.

Project kit
Materials
- Wool-blend felt or craft felt for the base
- Felt pieces in three more colors
- Embroidery floss and embroidery needle
- Wooden dowel, 1/4 in (6 mm) thick and 10 in (25 cm) long
- Cord or twine, about 18 in (46 cm)
- Paper, pencil and ruler
- Two round objects to trace
- Sharp scissors and pins
- Tacky craft glue (optional)
A banner on a dowel is one of the gentlest ways into felt wall decor: one sheet of felt becomes the background, a few cut shapes become the picture, and a single folded edge turns it into something that hangs. There are no seams to turn and no edges to hem, because felt does not fray.
The design here is a small weather scene, a sun tucked behind a cloud with three raindrops below, chosen because every piece comes from a circle, a fold or a ruler line. Swap in any simple shapes you like once you have seen how the layers go together.
What You Need
- One 9 x 12 in (23 x 30 cm) sheet of wool-blend felt or craft felt for the banner base
- Felt pieces in three more colors for the sun, cloud and raindrops
- Embroidery floss to match or contrast, and an embroidery needle
- A wooden dowel about 1/4 in (6 mm) thick and 10 in (25 cm) long
- Cord or twine, about 18 in (46 cm)
- Paper, a pencil, a ruler and two round objects to trace: one about 3 in (7.5 cm) and one about 1 1/2 in (4 cm) across
- Sharp scissors and pins
- Optional: tacky craft glue for holding pieces in place
Measure and Cut the Pieces
Banner base
Rule a rectangle 8 in (20 cm) wide and 11 in (28 cm) tall on the felt and cut it out. For the pointed bottom, mark the center of the lower edge, then mark each side edge 2 1/2 in (6.5 cm) up from the bottom. Rule a line from each side mark to the center mark and cut along both lines.
Applique shapes
- Sun. Trace the larger round object for a 3 in (7.5 cm) circle.
- Cloud. On paper, draw a straight baseline 4 1/2 in (11.5 cm) long. Trace the smaller round object three times above it so the circles overlap each other and sit on the line, with the middle one a little higher. Cut around the outer outline only.
- Raindrops. Fold a 1 x 1 1/2 in (2.5 x 4 cm) piece of paper in half lengthwise. Cut half a teardrop from the fold, pointed at the top and round at the bottom. Unfold and cut three from felt.
Paper patterns shift on felt, especially on small pieces such as the raindrops. The guide to felt templates and transfer methods compares pinning, taping and freezer paper so you can pick the one that suits your felt.
How to Make the Banner
- Mark the dowel fold. On the back of the base, rule a faint line 1 1/4 in (3 cm) below the top edge. This strip will fold to the back later, so keep all decoration below it.
- Arrange the design without fixing anything. Lay the sun slightly left of center, about 2 in (5 cm) below the fold line. Place the cloud so it covers the lower right part of the sun. Space the three raindrops evenly under the cloud. Leave at least 3/4 in (2 cm) of plain base around the whole group.
- Hold the back layer first. Lift the cloud away, then secure the sun with two pins or a pea-sized dot of glue in its center. Pieces are always attached from the back of the picture to the front.
- Stitch the sun. With two strands of floss, sew around the circle using a small whip stitch or a running stitch 1/8 in (3 mm) inside the edge. You can skip the part of the edge that the cloud will cover.
- Add the cloud, then the raindrops. Pin and stitch the cloud so it overlaps the sun, then each raindrop in turn. The article on felt applique goes further into holding small pieces and choosing a stitch for each layer.
- Add detail stitches. Short straight stitches radiating from the visible edge of the sun make rays. A line of running stitches following the point at the bottom frames the banner.
- Make the channel. Fold the top strip to the back along the marked line and pin. Sew a row of running stitches across the full width, 1 in (2.5 cm) below the fold, through both layers. This leaves a channel wide enough for the dowel to slide through easily.
- Add the dowel and cord. Slide the dowel in so it extends 1 in (2.5 cm) on each side. Tie the cord to each end with a double knot, snug against the felt.

Embroidery-Hoop Variation
A wooden embroidery hoop makes a round frame with no dowel and no folding. A 6 in (15 cm) hoop suits a small design such as a crescent moon and three stars.
- Cut the background. Trace the outer ring onto felt, then cut 1 in (2.5 cm) outside the traced line.
- Stitch the design flat. Complete all applique before the felt goes into the hoop, keeping it inside the traced circle with a 1/2 in (1.3 cm) margin.
- Mount it. Lay the felt over the inner ring, press the outer ring down over it and tighten the screw. Pull gently around the edge to smooth the felt without stretching the design.
- Tidy the back. Work a long running stitch around the extra felt, pull it up so the edge gathers behind the hoop and knot the thread.
The hoop also makes a good frame for a cluster of felt flowers stitched or glued onto the background.

Planning Your Own Felt Wall Decor
Two guidelines keep an original design readable from a distance:
- Limit the palette. One background color, two or three shape colors and one floss color are plenty.
- Keep shapes large. Anything under about 3/4 in (2 cm) is hard to cut and hard to see. Use stitches for fine detail instead.
If the stitching itself is new, practice the running stitch on a scrap first; the basics are covered in the guide to hand sewing felt.
Hanging Without Damaging Walls
A finished banner weighs only a few ounces, which opens up options that do not involve a drill:
- Removable adhesive hooks. A small one holds a felt banner easily. Follow the instructions on the pack for surface type and removal.
- A single sewing pin or pushpin. In drywall or a cork board this leaves only a pinhole.
- Existing fixtures. Loop the cord over a shelf bracket, a cabinet knob, a door hook or the corner of a picture frame.
Choose a spot out of strong direct sunlight, since dyed felt can fade over time, and away from heaters, stoves and candles. Lift dust off with a lint roller. If the banner will hang in a child’s room, place it out of reach, because the dowel and cord are not playthings.
Frequently asked questions
Do the edges of a felt banner need hemming?
No. Felt does not fray, so the cut edges can be left as they are. A line of running stitches near the edge is purely decorative.
Can the shapes be glued instead of stitched?
Yes. A thin layer of tacky craft glue or fabric glue holds flat shapes on a banner that will not be handled much. Keep the glue away from the edges so it does not soak through.
How do I hang a felt banner without making holes?
A felt banner is light enough for a small removable adhesive hook. It can also hang from an existing knob, shelf bracket or door hook.
What size embroidery hoop works for felt wall art?
A 6 in (15 cm) hoop suits a small design with two or three shapes. Cut the felt background about 1 in (2.5 cm) larger than the outer ring all around.