Hand Sewing Felt: Knots, Running Stitch and Neat Finishes
The fundamentals of hand sewing felt: threading and knotting, hiding the knot between layers, an even running stitch, a quick backstitch and ending off so no thread ends show.
Project kit
Materials
- Craft felt or wool-blend felt
- Embroidery floss in a contrasting color
- Embroidery needle, size 5 to 7
- Small scissors
- Pins
- Ruler and disappearing fabric pen (optional)
Hand sewing felt is about as forgiving as sewing gets. The edges do not fray, there are no hems to turn, and the fabric is thick enough to hide a knot inside itself. A needle, a length of floss and one basic stitch are enough to finish a real project in an evening.
What follows is the foundation that every other stitch builds on: threading the needle, starting with a hidden knot, working an even running stitch, strengthening a line with backstitch and ending off so nothing shows.
What You Need
- Two felt rectangles, each 4 x 3 in (10 x 7.5 cm), for practice
- Embroidery floss in a color that contrasts with the felt, so you can see your stitches
- An embroidery needle, size 5 to 7
- Small scissors and two pins
- A ruler and a disappearing fabric pen (optional, for spacing guides)
If you are unsure which floss weight or needle size to pick, the guide to needle and thread for felt matches them to each kind of task.
Threading the Needle and Tying the Knot
- Cut the floss. Measure about 18 in (45 cm), roughly fingertips to elbow. Longer thread tangles and frays.
- Separate two strands. Pull them out one at a time, then lay them together again.
- Thread the eye. Trim the end cleanly, pinch it flat so only a sliver shows between finger and thumb, and push the eye of the needle down onto it. Pull about 3 in (7.5 cm) through as a tail; the stitching is done with a single thickness, and the tail simply keeps the needle threaded.
- Tie a quilter’s knot. Lay the long end of the floss along the needle, pointing toward the tip. Wrap it around the needle three times, pinch the wraps and slide them down the needle and along the whole length of thread. A small, neat knot forms right at the end.
An ordinary overhand knot tied twice in the same spot works too.
Hiding the knot between layers
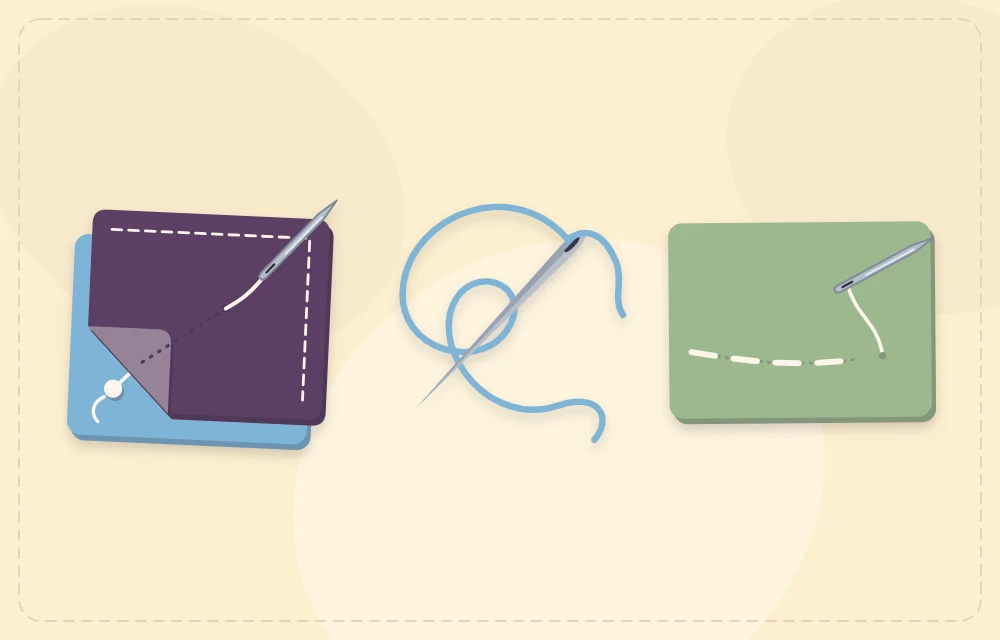
When two layers are being joined, the knot goes in the middle of the sandwich where no one will see it. Separate the layers at the starting point. Push the needle up through the top layer only, from the inside to the outside, about 1/8 in (3 mm) from the edge. Pull until the knot sits snugly against the inner surface, then lay the layers together and begin stitching through both.
On a single layer, start from the back and accept a small knot there.
Hand Sewing Felt With the Running Stitch
The running stitch is a dashed line: the needle goes down, comes up, goes down, at equal intervals. It joins flat layers, outlines shapes and gathers circles into flowers and pumpkins.
- Pin the layers. Stack the two rectangles with edges matching and pin near two corners.
- Bring the needle up. Start with the hidden knot so the thread emerges on the front, 1/8 in (3 mm) from the edge.
- Go down one stitch length away. Insert the needle straight down through both layers about 1/8 in (3 mm) along the seam line. Pull the thread through until it lies flat without denting the felt.
- Come up the same distance further on. Push the needle straight up from the back, leaving a gap equal to the stitch.
- Repeat along the edge. Work one motion at a time, down and then up, which keeps the back as neat as the front.
- Turn the corner. End a stitch exactly at the corner point, then begin the next side from that same spot.
Tip
Keep the needle perpendicular to the felt as it passes through. A slanted needle comes out in a different place on the back, which is why a line can look straight on the front and wander underneath.
Keeping the spacing even
- Mark a few dots 1/8 in (3 mm) apart with a disappearing pen for the first inch, then continue by eye.
- Watch the distance from the edge as much as the stitch length; a wavy line shows more than slightly uneven stitches.
- Check the tension every few stitches by smoothing the seam flat. Ripples mean the thread is pulled too tight.
Backstitch for a Solid Line
Backstitch fills the gaps of a running stitch to make a continuous line. It is stronger, and it is the stitch for smiles, stems and outlines. Bring the needle up one stitch length ahead of where the line starts. Take it back down at the starting point, then bring it up one stitch length beyond the thread. Each new stitch travels backward to meet the end of the previous one. Keep stitches short, about 1/8 in (3 mm), and shorter still around curves.
Ending Off Invisibly
- Stop with enough thread. End while at least 4 in (10 cm) of floss remains; a shorter tail is difficult to knot.
- Take the needle between the layers. After the last stitch, bring it out between the two pieces of felt rather than on the front or back.
- Knot on the inside. Catch a few fibers of the inner surface with the needle, pass the needle through the loop that forms and pull snug. Repeat once.
- Bury the tail. Slide the needle between the layers for about 1 in (2.5 cm), bring it out through the top, pull gently and snip the thread flush. The end springs back inside.
Running, Whip or Blanket Stitch?
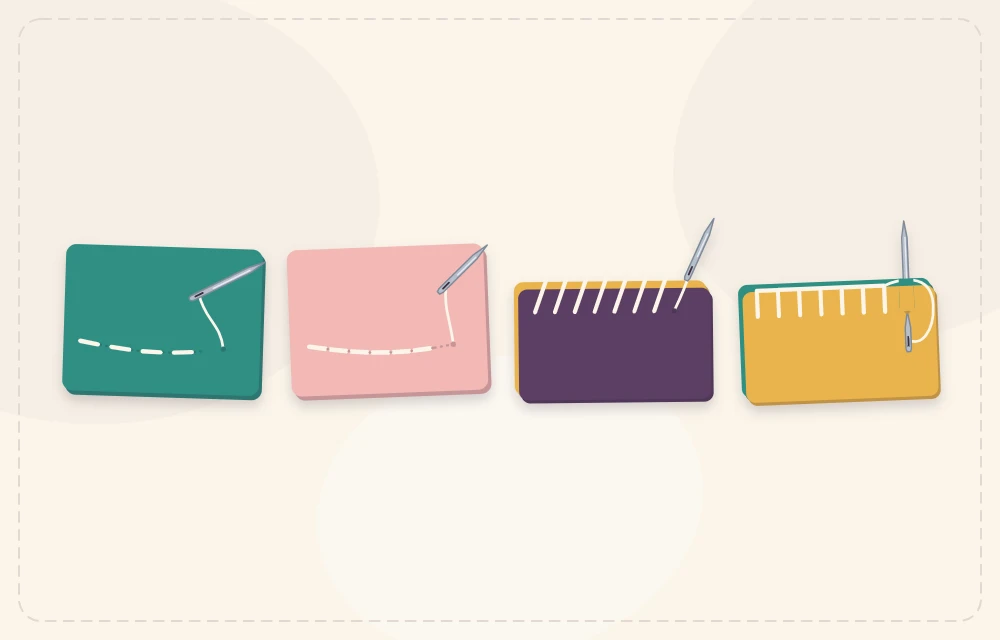
| Stitch | Where the thread sits | Use it for |
|---|---|---|
| Running stitch | A dashed line inside the edge | Flat double layers such as coasters and bookmarks, gathering, decorative lines |
| Backstitch | A solid line on the surface | Faces, outlines, seams that take strain |
| Whip stitch | Small slanted stitches over the edge | Fast, low-profile joining of stuffed shapes and applique |
| Blanket stitch | A bar along the edge with upright legs | Decorative edges that also join two layers |
Running stitch leaves the cut edges open, so on a stuffed piece the filling can peek out; that is the moment to switch to the whip stitch, which closes the edge completely. When the edge itself should be a feature, the blanket stitch does the same job with a neat outline.
Practice Exercise
Sew the two practice rectangles together around all four sides with running stitch, hiding the starting knot and burying the final tail. Turn it over: if the back looks nearly as tidy as the front and no knots are visible, the fundamentals are in place. Supervise children while they practice.
Frequently asked questions
What is the easiest stitch for sewing felt by hand?
The running stitch. It is a simple dashed line worked down and up through the felt, and it is enough to join flat layers for coasters, bookmarks and tags.
How do I hide the knot when sewing felt?
Start between the two layers. Bring the needle up through the top layer only, from the inside, so the knot is trapped in the middle when the layers are stitched together.
How far apart should stitches be on felt?
About 1/8 in (3 mm) long and the same distance from the edge suits most small projects. Larger items can take stitches up to 1/4 in (6 mm).
Why does my seam pucker?
The thread is being pulled too tight. Pull each stitch only until it lies flat on the surface, and smooth the seam between your fingers every few stitches.